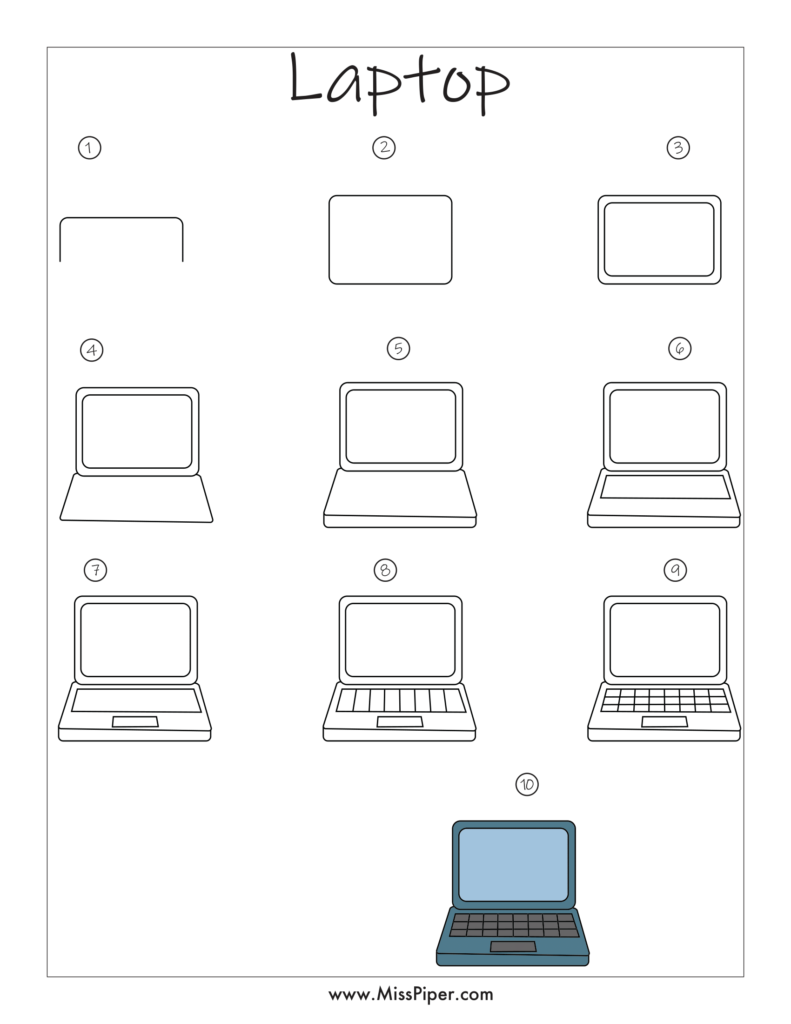
Free Printables: How to Draw a Laptop Step by Step
Drawing a laptop can be a fun way to practice art skills and learn more about technology. Whether you’re creating a drawing for a school project or just for fun, learning how to draw a laptop can be both educational and enjoyable. Our free printables provide a step-by-step guide to help you create your own laptop drawing with ease.
Why Learn How to Draw a Laptop?
Drawing a laptop offers several benefits:
- Enhances Creativity: Experiment with different laptop designs and colors.
- Improves Drawing Skills: Practice basic shapes, lines, and details.
- Provides Enjoyment: Create a useful and modern drawing that can be used in various projects.
What You Need
Before you start drawing, gather these materials:
- A pencil for sketching
- An eraser for corrections
- Colored pencils, markers, or crayons
- Our free printable How to Draw a Laptop worksheets
How to Draw a Laptop Step by Step
Follow these simple steps to draw a laptop. Our free printables make it easy to create a realistic and detailed laptop drawing.
Step 1: Draw the Laptop Base
Start by sketching the main body of the laptop.
- Base Shape: Draw a large rectangle with rounded corners. This will be the base of the laptop where the keyboard and trackpad are located.
Step 2: Draw the Laptop Screen
Add the screen of the laptop.
- Screen Shape: Draw another rectangle on top of the base, slightly smaller and centered. This will be the laptop screen. Make sure the screen is aligned with the base to create a realistic look.
Step 3: Add the Keyboard and Trackpad
Next, draw the keyboard and trackpad.
- Keyboard: Inside the base rectangle, draw several small rectangles or squares to represent the keys of the keyboard. You can arrange them in rows to show the keyboard layout.
- Trackpad: Draw a small rectangle or square below the keyboard to represent the trackpad.
Step 4: Add Details to the Screen
Make the screen look more realistic by adding details.
- Screen Details: Draw a thin rectangle inside the screen rectangle to represent the screen border. You can also add small lines or dots on the screen to represent icons or a logo.
Step 5: Draw the Laptop Hinges
Add the hinges that connect the screen to the base.
- Hinges: Draw two small rectangles or circles on either side of the base, where the screen connects to the base. These will be the hinges.
Step 6: Refine Your Drawing
Clean up your drawing to make it neat and polished.
- Erase Extra Lines: Use your eraser to remove any extra lines or mistakes.
- Smooth Lines: Go over your drawing with your pencil to ensure all lines are clean and clear.
Step 7: Color Your Laptop
Now it’s time to add color to your drawing!
- Base Color: Choose a color for the laptop base. It could be silver, black, or any color you like.
- Screen Color: Color the screen with a light blue or gray to represent the screen display.
- Keyboard and Trackpad Color: Use a contrasting color for the keyboard and trackpad.
Free Printable How to Draw a Laptop Worksheets
To make drawing easier, we’ve created free printables of how to draw a laptop step by step. These worksheets provide clear instructions and visuals to help you draw a realistic laptop. Print them out and follow the steps to create your own laptop drawing!
Why Drawing a Laptop is Fun for Kids
Drawing a laptop provides several benefits:
- Boosts Creativity: Kids can design laptops with different colors and screen designs.
- Improves Fine Motor Skills: Drawing helps develop fine motor skills and hand-eye coordination.
- Encourages Focus: Following step-by-step instructions helps kids stay focused and engaged.
Fun Ideas for Drawing Laptops
Once you’ve mastered how to draw a laptop, try these fun ideas:
- Design Your Own Laptop: Create laptops with unique colors, patterns, or designs.
- Draw a Laptop Scene: Illustrate a scene where someone is using the laptop for different activities.
- Create Laptop Stickers: Turn your drawing into fun stickers or decorations.
Conclusion
Learning how to draw a laptop step by step is a fun and educational activity that helps kids practice their drawing skills. With our free printables, you can easily follow along and create your own detailed laptop illustration.
Download our free printable worksheets today and start drawing your perfect laptop. Whether for a school project or just for fun, drawing a laptop is a great way to enhance artistic skills and enjoy creativity.
We hope our drawing activities bring joy and creativity to kids everywhere. Happy drawing!
